The English version of the head and body tutorial by Atelier Pippilotta, as well as the Little Gnome tutorial
See below or via the PDF linked here: Mini Tutorial by Atelier Pippilotta PDF
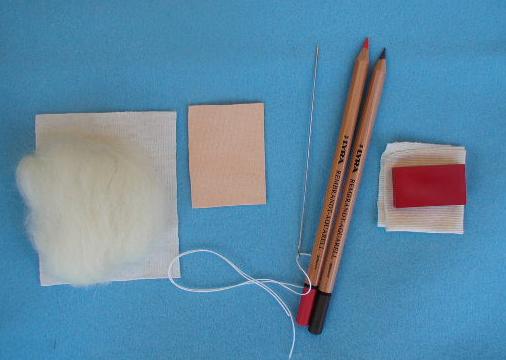
To make a head you will need:
– piece of beige tricot (thin stretchy interlock)
– piece of skin-tone tricot (interlock/doll skin)
– tuft of sheep wool
– long needle
– aquarelle (water-colour) pencils
– cheek rouge (red beeswax block)
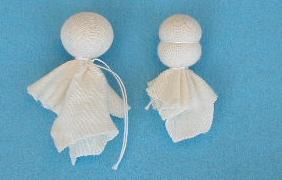
Put the tuft of wool in the beige tricot. Make a ball with it.
The measurement of the head is made from neck to neck.
For the eye-line stitch a strong thread in the middle of the head.
Wrap the thread around the head twice, pull it tight and fasten it securely.
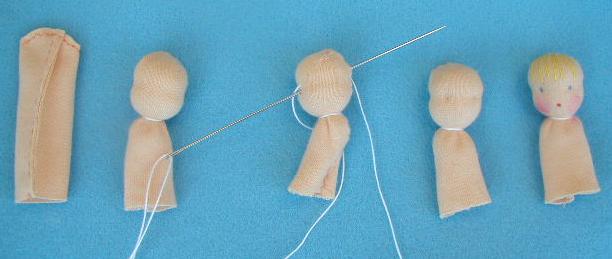
Fold the skin-tone tricot in half lengthwise and sew the seam. Fold the seam open and sew the top closed in a bow shape. Cut excess fabric off. Put the tube over the head and bind the neck off. Pull the eyes inward with a thread through the front to the back just above the eye-line. Stitch under the eye-line again to the back of the head. Repeat for the other eye. Pull the threads in the back of the head and knot off. Stitch thread-ends away. Colour the face in with aquarelle pencils, making sure the pencil has a sharp point. Put a little stripe in for the eyes and a little stripe for the mouth. To get the colour more rich make your pencil tips slightly wet. The cheeks can be coloured in with the side of a red pencil or you can use a block of red beeswax crayon. Embroider for the bangs a few hairs on the head.
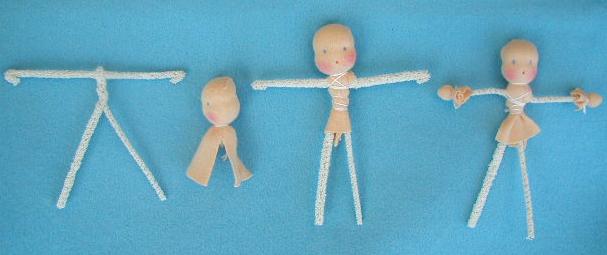
Make a body from pipe-cleaners. The length of the pipe-cleaners is written on the pattern. Bend the ends of the arms a half cm (quarter inch) inwards. Cut the neck on the sides and push it onto the body in between. Bind the neck under the arms together. Wrap a little bit of wool around the hands and bind these off with small squares of skin-tone tricot. For further dressing follow the instructions in the pattern.
For sewing felt together use a blanket stitch. On the picture you can see how the stitch is made:
![]()
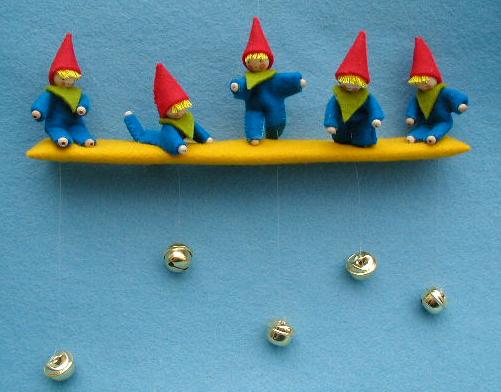
LITTLE GNOME
There are many kits from Atelier Pippilotta that are made with a standard pattern.
Here you can see how the little dolls are made in this photo tutorial.
Instructions for the little gnome:
Cut all pieces on the pattern out of felt without a seam allowance. Make a body from pipe-cleaners. The measurements are in the pattern. Push the neck of the pipe-cleaner in the neck opening of the suit. Blanket stitch the suit around. Put the collar around the neck. Glue the little beads onto the hands and feet and the large one onto the neck. Cut the thread in the kit into little pieces for hair. Glue it onto the head for bangs. Fold the hat double and blanket stitch closed. Put a little glue in the hat and put it on the head.
Perhaps trim the hair a little.

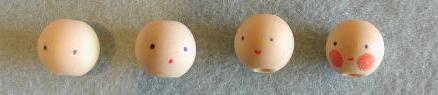
COLOURING IN OF THE BEAD HEADS
For the colouring of the heads I use a gel pen, a red pencil and cheek rouge.
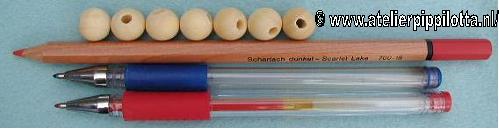
For the eyes set two dots in the middle of the head. This you can do with a blue or brown gel pen. The mouth goes underneath with a red pen. The cheeks are coloured in with a red pencil.